Installing Graylog and Configure Server
Prerequisites
- JDK
- MongoDB
- Elasticsearch
- Graylog
Installing JDK
sudo apt-get update && sudo apt-get upgrade
sudo apt-get install apt-transport-https openjdk-11-jre-headless uuid-runtime pwgen
Installing MongoDB
sudo apt-key adv --keyserver hkp://keyserver.ubuntu.com:80 --recv 9DA31620334BD75D9DCB49F368818C72E52529D4

echo "deb [ arch=amd64 ] https://repo.mongodb.org/apt/ubuntu bionic/mongodb-org/4.0 multiverse" | sudo tee /etc/apt/sources.list.d/mongodb-org-4.0.list

sudo apt-get update
sudo apt-get install -y mongodb-org
The last step is to enable MongoDB during the operating system’s startup and verify it is running.
sudo systemctl daemon-reload
sudo systemctl enable mongod.service
sudo systemctl restart mongod.service
sudo systemctl --type=service --state=active | grep mongod
Installing ElasticSearch
Graylog can be used with Elasticsearch 7.x; follow the below instructions to install the open-source version of Elasticsearch.
wget -q https://artifacts.elastic.co/GPG-KEY-elasticsearch -O myKey
sudo apt-key add myKey
echo "deb https://artifacts.elastic.co/packages/oss-7.x/apt stable main" | sudo tee -a /etc/apt/sources.list.d/elastic-7.x.list
sudo apt-get update && sudo apt-get install elasticsearch-oss
Modify the Elasticsearch configuration file /etc/elasticsearch/elasticsearch.yml, set the cluster name to Graylog, and uncomment action.auto_create_index: false to enable the action:
sudo tee -a /etc/elasticsearch/elasticsearch.yml > /dev/null <<EOT
cluster.name: graylog
action.auto_create_index: false
EOT
After you have modified the configuration, you can start Elasticsearch and verify it is running.
sudo systemctl daemon-reload
sudo systemctl enable elasticsearch.service
sudo systemctl restart elasticsearch.service
sudo systemctl --type=service --state=active | grep elasticsearch
Installing Graylog
wget https://packages.graylog2.org/repo/packages/graylog-4.3-repository_latest.deb
sudo dpkg -i graylog-4.3-repository_latest.deb
sudo apt-get update && sudo apt-get install graylog-server graylog-enterprise-plugins graylog-integrations-plugins graylog-enterprise-integrations-plugins
If you do not want the Integrations Plugins or the Operations Plugins installed, then simply run sudo apt-get install graylog-server.
Edit the Configuration File:
Read the instructions within the configurations file and edit as needed, located at /etc/graylog/server/server.conf. Additionally, add password_secret and root_password_sha2 as these are mandatory and Graylog will not start without them.
To create your root_password_sha2 run the following command:
echo -n "Enter Password: " && head -1 </dev/stdin | tr -d '\n' | sha256sum | cut -d" " -f1
To be able to connect to Graylog, you should set http_bind_address to the public hostname or a public IP address of the machine to which you can connect. More information about these settings can be found in Configuring the web interface.
The last step is to enable Graylog during the operating system’s startup and verify it is running.
sudo systemctl daemon-reload
sudo systemctl enable graylog-server.service
sudo systemctl start graylog-server.service
sudo systemctl --type=service --state=active | grep graylog
Creating an Input In Graylog Dashboard
Let’s add a new input to Graylog to receive logs. Inputs tell Graylog which port to listen on and which protocol to use when receiving logs. We 'll add a Syslog UDP input, which is a commonly used logging protocol.
When you visit http://your_server_ip:9000 in your browser, you’ll see a login page.
To view the inputs page, click the System dropdown in the navigation bar and select Inputs.
You’ll then see a dropdown box that contains the text Select Input. Select Syslog UDP from this dropdown, and then click on the Launch new input button.
A modal with a form should appear. Fill in the following details to create your input:
For Node, select your server. It should be the only item in the list.
For Title, enter a suitable title, such as Linux Server Logs.
For Bind address, use your server’s private IP. If you also want to be able to collect logs from external servers (not recommended, as Syslog does not support authentication), you can set it to 0.0.0.0 (all interfaces).
For Port, enter 8514. Note that we are using port 8514 for this because ports 0 through 1024 can be only used by the root user. You can use any port number above 1024 should be fine as long as it doesn’t conflict with any other services.
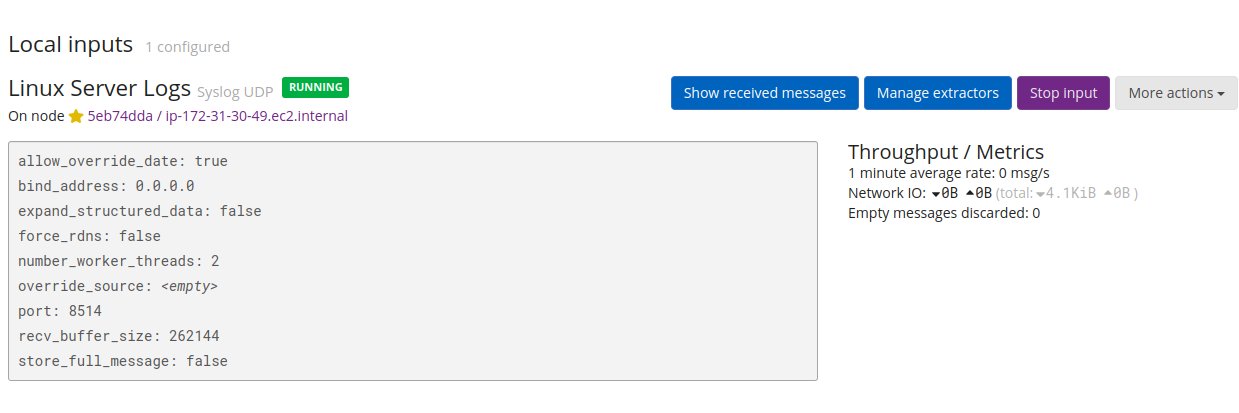
Click Save. The local input listing will update and show your new input, as shown in the following figure

Now that an input has been created, we can send some logs to Graylog. Configure Server to send Logs to Graylog
We have an input configured and listening on port 1514, but we are not sending any data to the input yet, so we won’t see any results. rsyslog is a software utility used to forward logs and is pre-installed on Ubuntu, so we’ll configure that to send logs to Graylog.
We'll configure the Ubuntu server running Graylog to send its system logs to the input we just created, but you can follow these steps on any other servers you may have.
If you want to send data to Graylog from other servers, you need to add a firewall exception for UDP port 8514.
sudo ufw allow 8514/udp
Create and open a new rsyslog configuration file in your editor.
sudo nano /etc/rsyslog.d/60-graylog.conf
Add the following line to the file, replacing your_server_private_ip with your Graylog server’s private IP.
*.* @your_server_private_ip:8514;RSYSLOG_SyslogProtocol23Format
Save and exit your editor.
Restart the rsyslog service so the changes take effect.
sudo systemctl restart rsyslog
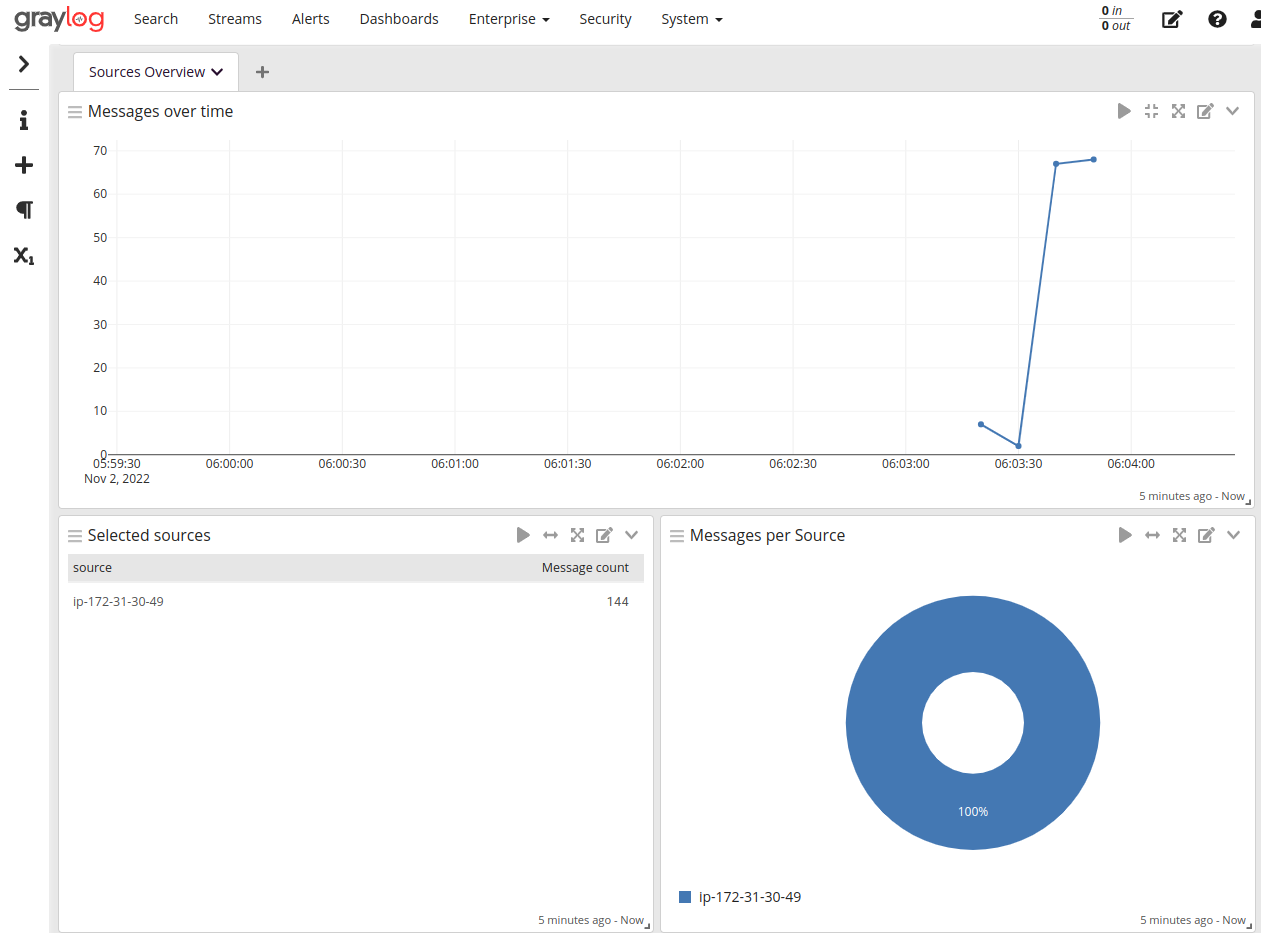
Repeat these steps for each server you want to send logs from. You should now be able to view your logs in the web interface. Click the Sources tab in the navigation bar to view a graph of the sources. It should look something like this:
